Check out these DIY hacks that will help make your building projects faster and easier.
If you love doing DIY projects, you probably have a shop or at least a designated area in your home or garage where you get your building groove on. You also have certain DIY tasks that you perform often. If you want to optimize your workspace and streamline your creative process, you’re wisely asking, “What are some DIY tips?”
Here are seven DIY tips and tricks that will make all your DIY crafts easy.
- Pencil Guidance for Sanding
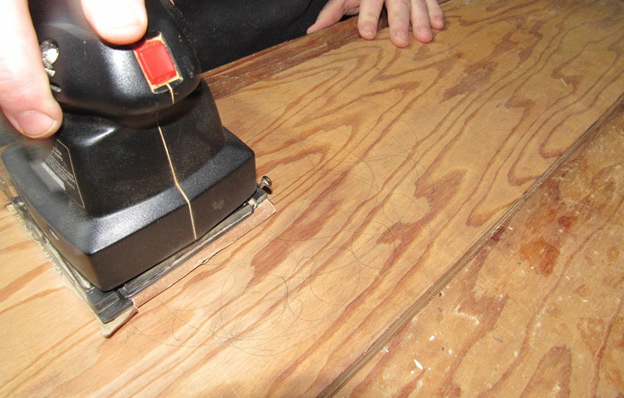
Many DIY building projects require sanding, but it can be tough to sand surfaces smoothly and evenly. If you want to be sure you sand an entire surface uniformly, get out your pencil.
Before you sand the surface, use your pencil to lightly cover the whole area with big and small loops. As you sand, you’ll know where you’ve been and where you have yet to go. The key to this technique is that the pencil lines must be very light. If you draw dark pencil lines on the surface, you’ll have trouble sanding them out, even with fine sandpaper grits.
- Label Differently Sized Tools

Yes, all sized tools like wrenches or sockets are labeled by the manufacturer, but those labels aren’t meant for easy reading. You can greatly speed up your projects if you create easy-to-see labels. Just wrap a small part of the tool in a couple layers of colored tape. Then write the tool size on the tape with a permanent marker. If you want to make grabbing the right tool even easier, use different colors for each size. If you use the tools often, you’ll quickly learn which color corresponds to which size, and you will be able to grab the right tool without having to read any numbers
- Make Pencil Holders
Pencils are essential to a DIYer. Whether you’re marking lengths of wood for building a deck or you’re sketching out a design, you need a pencil at hand. If you’re like me, even though you have dozens of pencils, they like to disappear into the ether. To make sure at least one or two pencils hang around for DIY help when you need it, try either of these two tricks.
* Drill a Pencil Hole in Your Workbench or Storage Shelving
If you have a work area with a bench or shelf, you don’t need to get a fancy pencil holder, just drill a horizontal hole into the edge of your bench or shelf to hold the pencil.
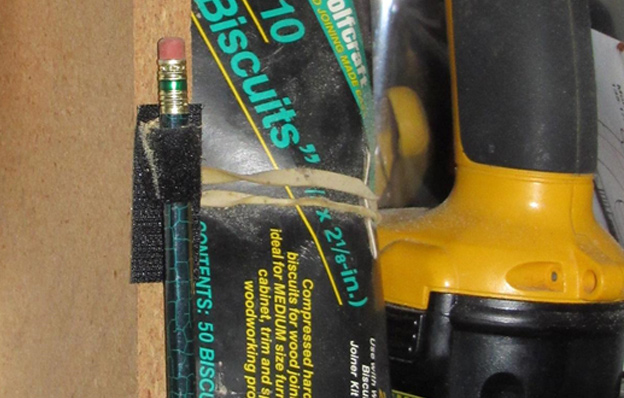
* Make a Velcro Pencil Holder
If you’re not comfortable using a drill, you don’t have to drill a hole. (But there really is nothing to be afraid of when you know some simple DIY drill bit tips.) You can use Velcro instead. Just wrap some self-stick Velcro around a pencil and adhere the opposite Velcro strip to wherever you want to keep a pencil handy.
- Do the Tape and Nail Trick
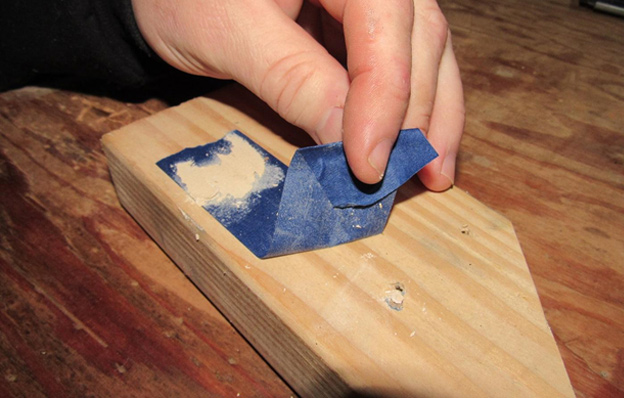
At some point, a DIY project will require using finish nails. If those nails will be visible in the finished product, you’ll need to cover them with putty. If you’ve tried to use nail putty, you know it’s quite difficult to get it looking smooth.
This tape and nail trick is one of the best DIY tips for home projects because it helps prevent sloppy finishing. All you do is put a strip of painter’s tape over the area where you’re going to drive your finish nails. Drive the nails through the tape, and then after the nails are in, apply putty over them. Wait until the putty dries and then pull up the tape. Lightly sand the putty dots, and voila! You have neatly covered finish nails.
- Use a Fingernail Substitute
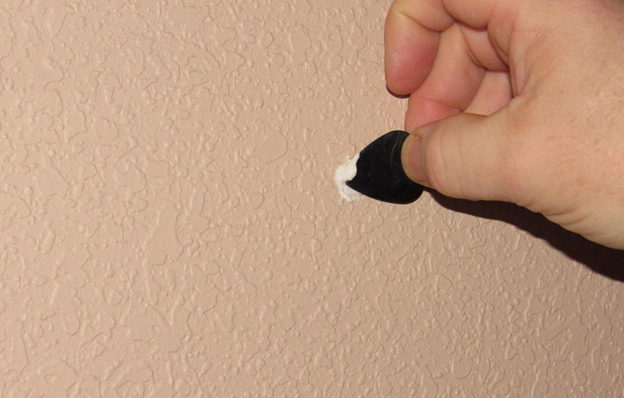
Small fingertips and strong fingernails of at least some minimal length can come in handy in DIY jobs like the nail-hole puttying task above or like tucking a bit spackle or glue into a tiny hole or scratching a bit of glue out of a corner. If you don’t have fingernails that work for this type of thing, try a substitute. A cheap guitar pick is a perfect “tool” for these little dabbing or scraping tasks.
- Make a Bed of Nails
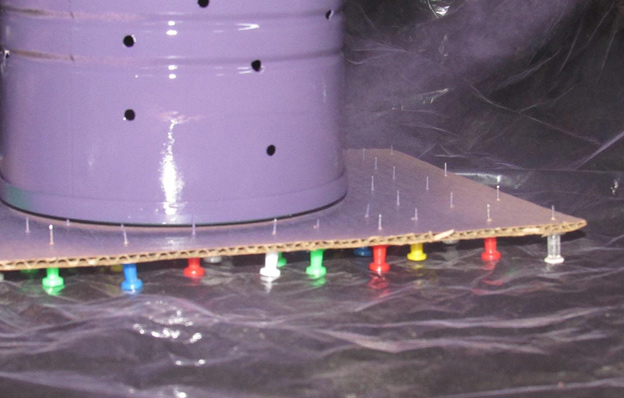
Don’t worry. You’re not going to lie on it. A DIY “bed of nails” is one of those handy DIY tricks of the trade for projects that need paint.
A common DIY mistake is letting paint puddle onto the bottom of painted surfaces. This happens if you apply too much paint. The paint drips down and forms a clump at the bottom of whatever you’re painting.
This can’t happen if your project is floating above your work surface. Although you can buy special pointed stands for this purpose, you don’t have to spend that money to make a “floating” paint surface. Just poke a bunch of pushpins or thumbtacks through a piece of cardboard. Set the cardboard on your work surface pointy side up and set your project on the pin tips. They’ll hold up your creation without damaging it, and any paint drips will fall off and away from the bottom.
- Make Plywood Storage Ts
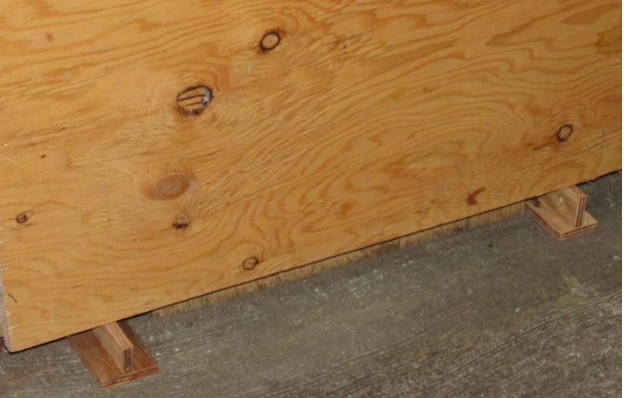
We don’t always get to our new projects right away. Say you bought a piece of plywood for building a DIY headboard, but you’re not ready to use it. Do you store your plywood pieces in your garage or in a basement? Most of us who don’t have a shop do. But if you just set plywood wood on the floor of the garage or basement, moisture and dirt can ruin the edges of the pieces. To prevent this, make some plywood storage Ts.
They’re easy to make. To make one T, cut a couple lengths of 2-inch plywood scraps. (The length you choose will depend on how much wood you have to store.) Now screw one of the scraps perpendicularly into the other to form a long T shape. When you make a pair of these, you can balance your wood upon these upside-down Ts and keep it high and dry.
Successful and enjoyable DIY projects hinge on having the right tools, materials, and procedures. The above DIY tips and tricks should expand your arsenal of clever techniques to make your DIY efforts stress-free and satisfying.